


1
/
of
3
String bending tool
String bending tool
Regular price
$49.00 AUD
Regular price
Sale price
$49.00 AUD
Shipping calculated at checkout.
Quantity
Couldn't load pickup availability
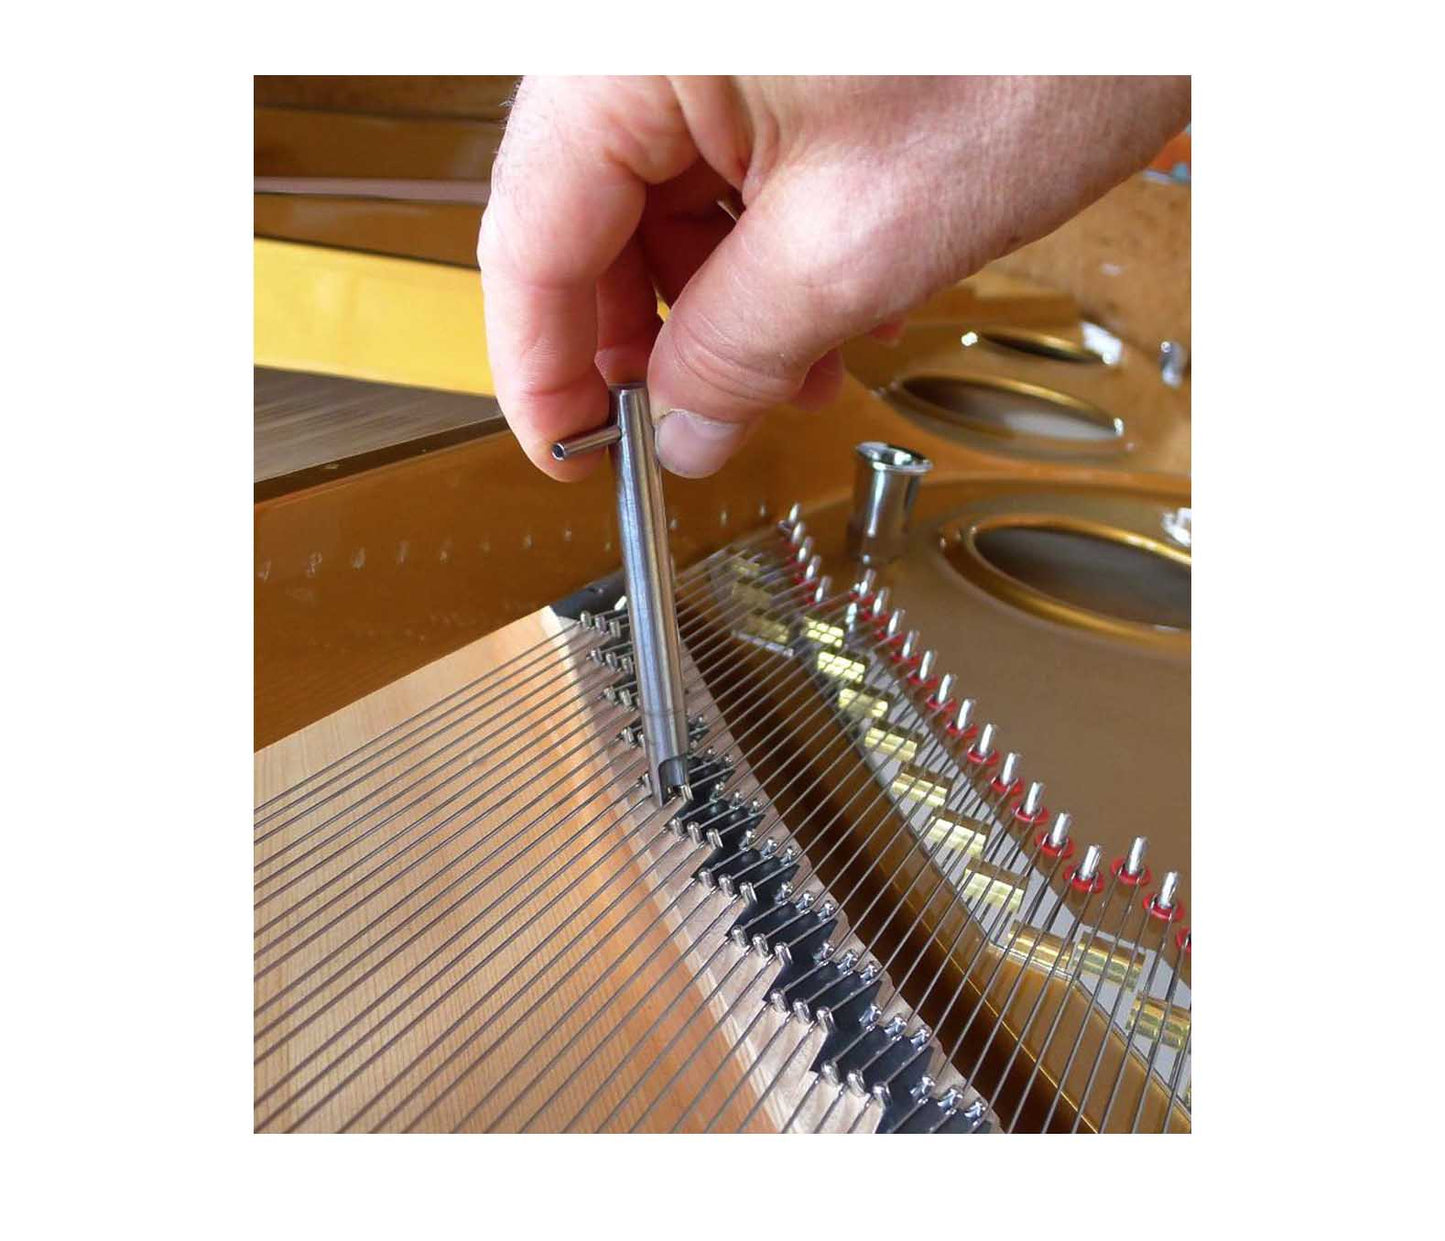
The purpose of this tool is to help define the bends of the piano wire at the bridge pins on new pianos or new strings. Piano wire, acting as a spring, is resilient and resists bending. When wires are strung across the bridge, they are forced to run at an angle between the offset bridge pins. Where they leave the bridge they do not run in a straight line between the bridge pin and the terminations. Instead, because of their resistance to bending, they exit the bridge and run in a curved line toward the terminations. Even at full pitch, the tension on the wire does not pull the wire entirely straight because of the wire’s resistance to being bent at the bridge pin. It takes years for the wire to slowly and eventually conform to the forces upon it and yield at the bridge pin. This leads to long term pitch instability and also tonal deficiency. We like to tell clients that on new or newly-strung pianos, the “strings are still stretching” and therefore, repeated tunings are needed. In fact, the wire does not stretch. Rather, over time it yields and conforms to the various “deformations” it has been asked to do – winding around the tuning pin, bending at the terminations and bridge pins. With the string bending tool, we help define the wire bends at the bridge pins for the same reason that the strings are lifted at the front termination. This helps to give a more focused tone, and it reduces tuning instability and helps to shorten the settling in time of replacement strings and newly strung pianos. Using of the tool: Place the opening in the end of the tool over a bridge pin. Twist the tool slightly so the prong flexes the wire in tighter around the bridge pin. Very little force is required. If you begin with a clean unison, you will immediately hear how the pitch of the string drops. We recommend to begin with the piano at pitch, or preferably even a little above its final pitch. Begin with the non-speaking lengths in the back scale. Work along the bridge from one pin to the next, giving each string a little tweak Check your progress by listening to the unisons. If after the first pass the pitch has dropped below the final target pitch for the instrument, raise the pitch to slightly above target, then work on the speaking length bridge pins. Don’t over-do it. As with any work regarding piano refinement, work carefully and err on the side of less, to work toward your goal.


Video
Product Specifications
Features
Dimensions
- Weight: 55 g
- Size: 12 cm 2 cm 6 cm